

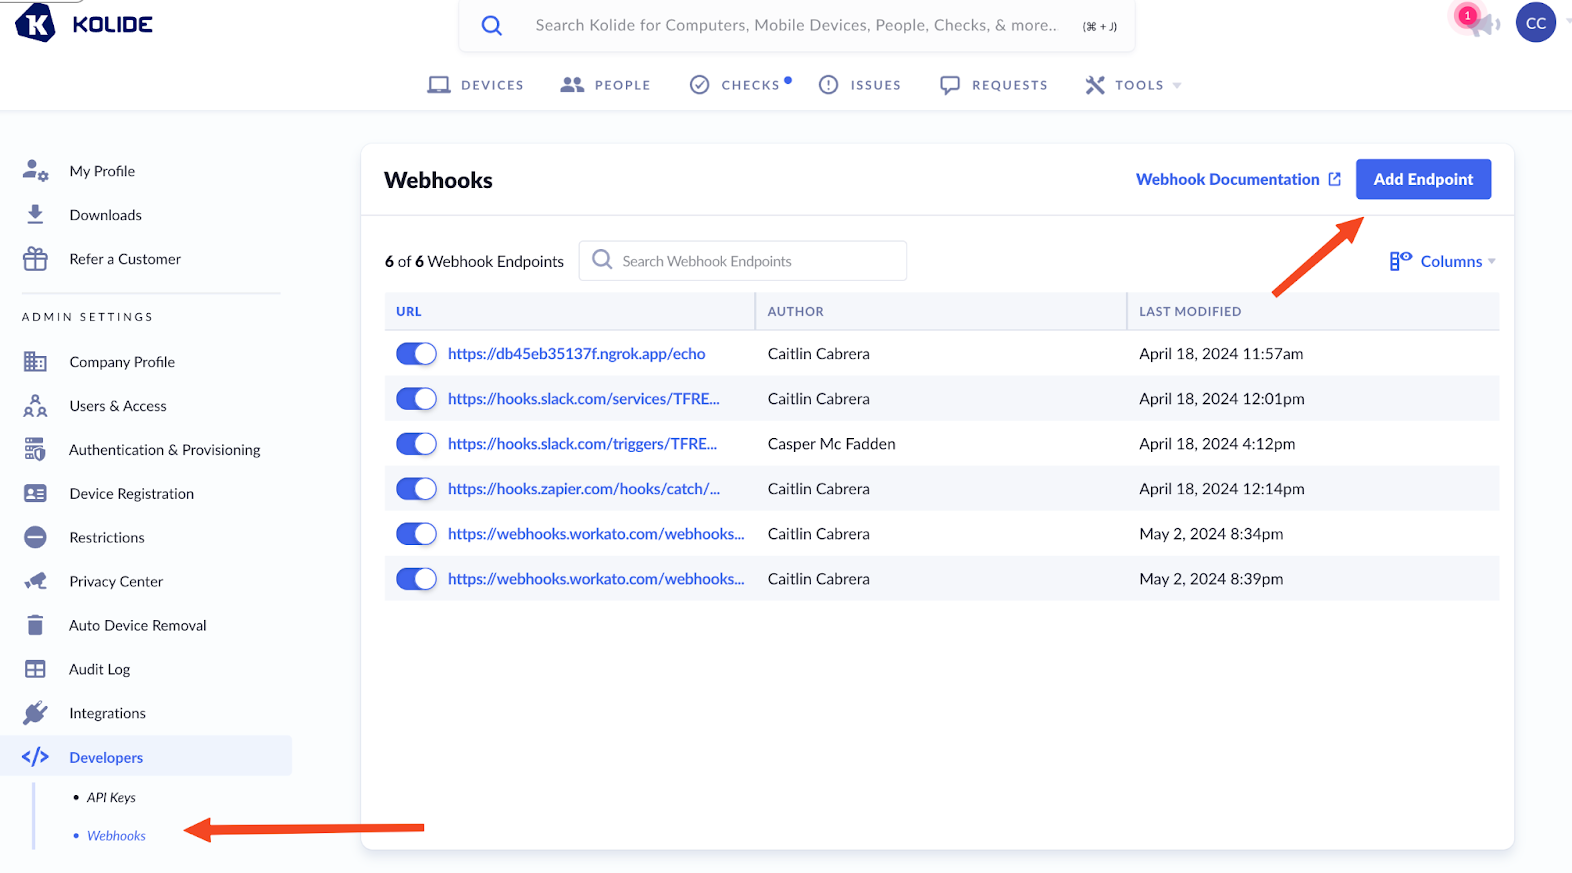
Usecases
Using Kolide’s Authentication Webhooks
You can use Kolide’s webhooks for automating actions that are triggered from Kolide.
This guide will use Kolide’s webhooks to demonstrate a setup you can use to extend a users Slack session. In our scenario, we will:
- Set up an automation service. (such as Workato or Zapier)
- Create a webhook within Kolide that is subscribed to
auth_logs.success. - Configure our Slack settings to utilize the webhook and automation service.
- Set up a workflow that extends the users Slack session upon a successful authentication.
Step 1: Set up an automation tool or a service to receive the webhook. This can be a service such as Zapier or Workato. We just need something that will massage out the nested data our API returns, since Slack only accepts data in a specific format.
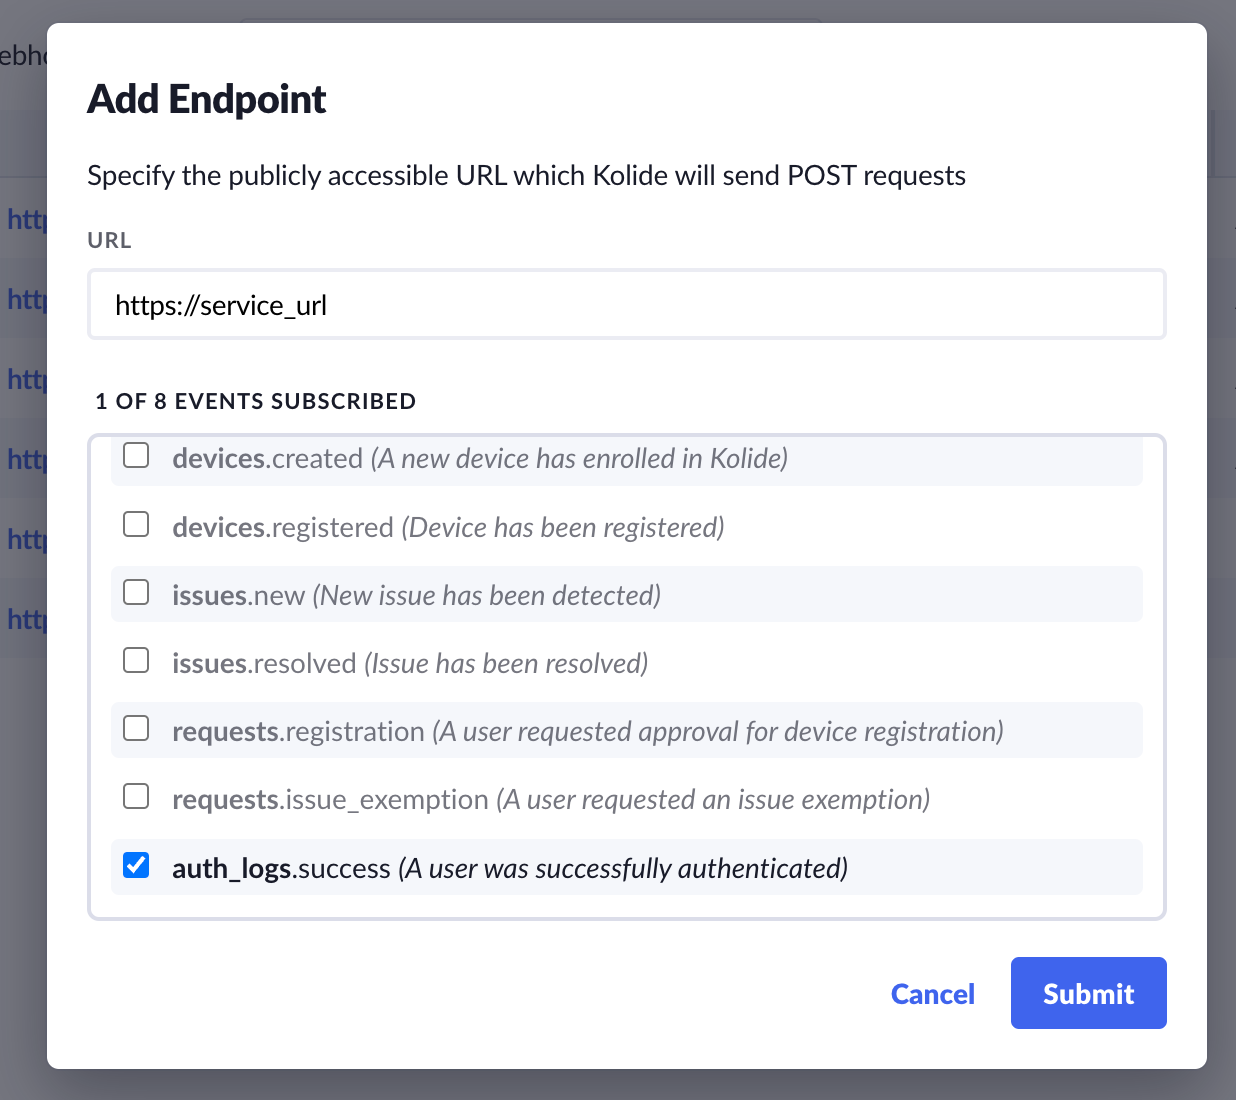
Step 2: Set up a new webhook that is subscribed to the auth_logs.success event in Kolide. We have more documentation here, or you can follow along with the screenshots below!
Add the URL from the service you used in Step 1. Make sure that you subscribe to the auth_log.success webhooks.
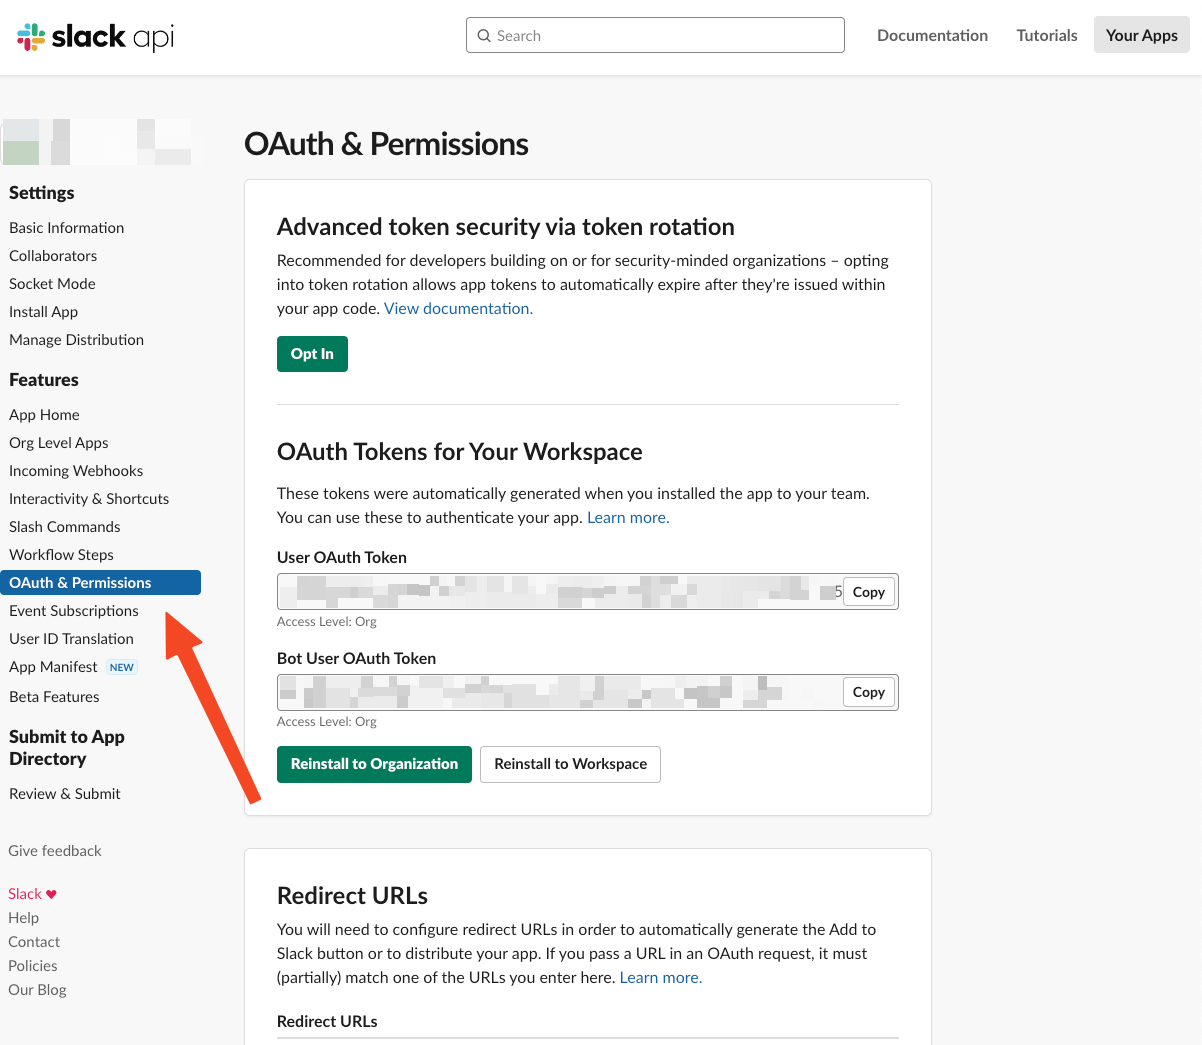
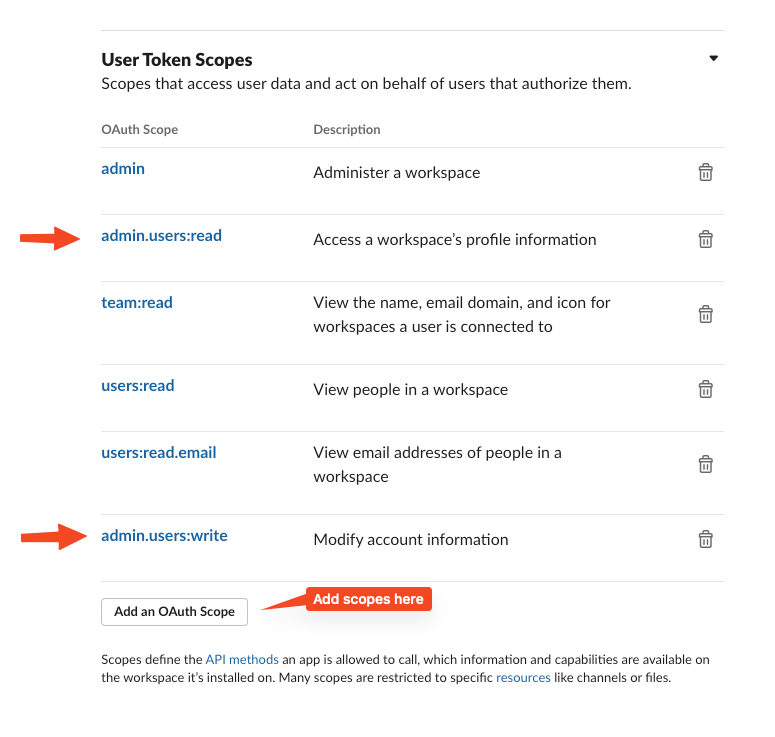
Step 3: Navigate to the settings of your Slack app and make sure you have the required permissions of admin.users:read, and admin.users:write. While you’re here, grab the User OAuth Token.
Step 4: When a user has a successful authentication, a webhook will be sent! Now we just need to parse that data, make an API call or two, and we’ll have this all set up!
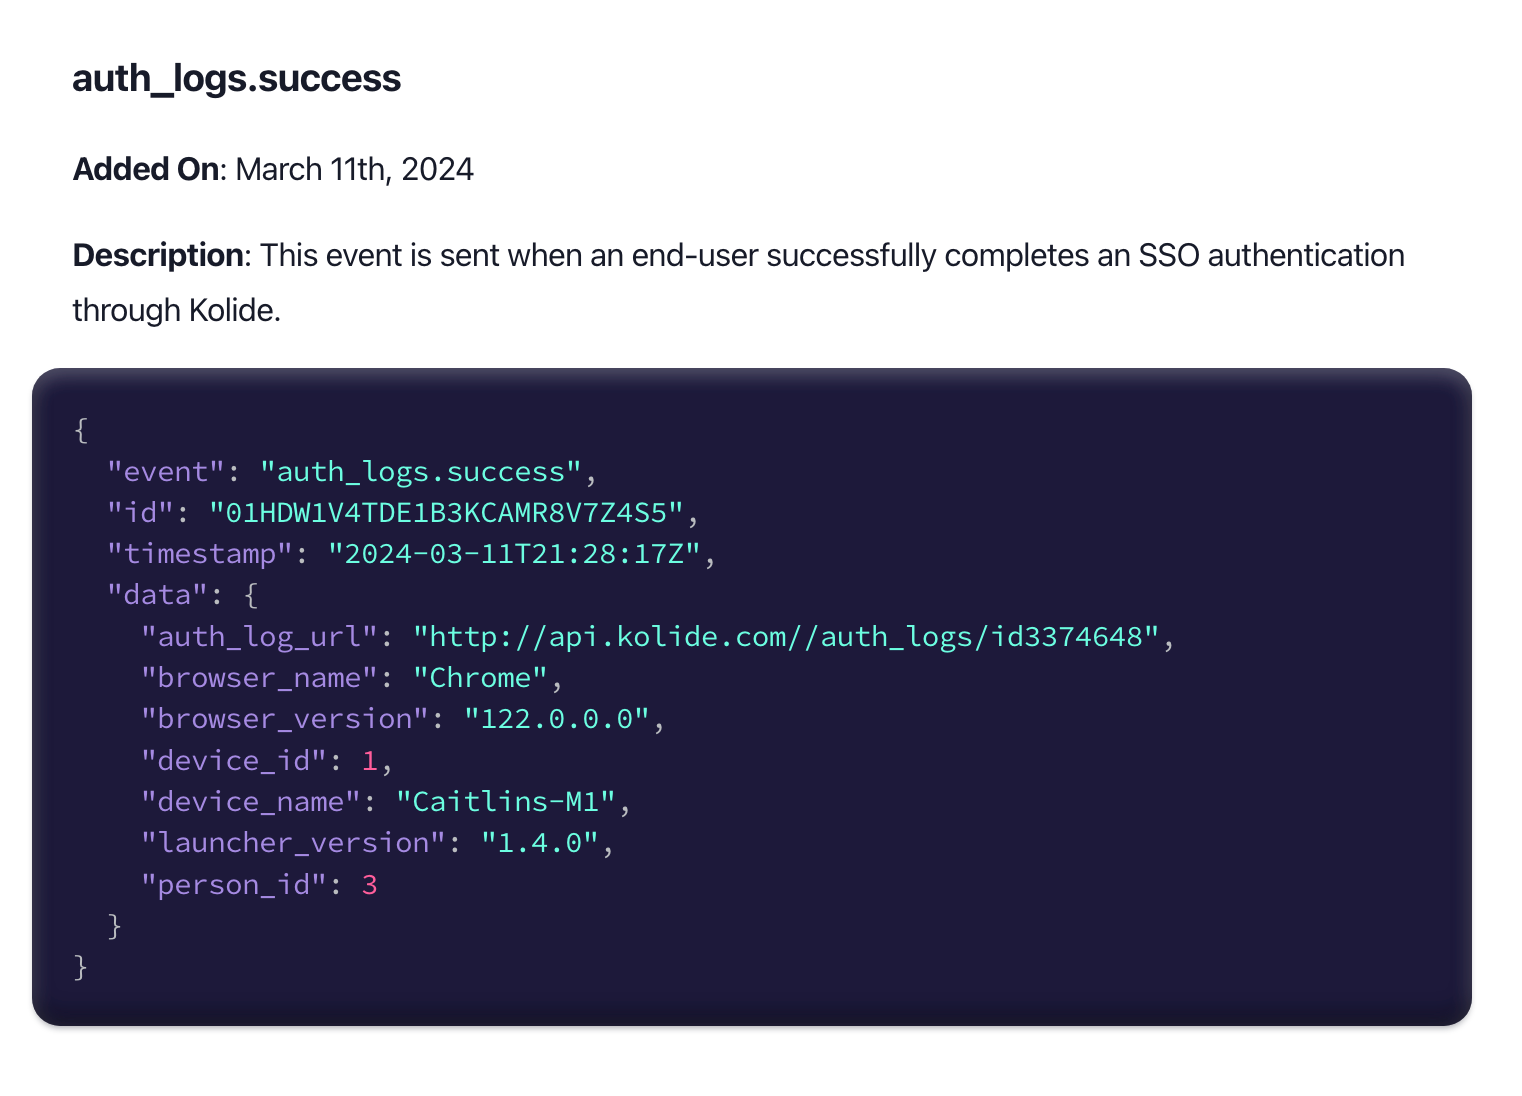
Below is an example of the data we get back from the auth success webhook. You see that auth_log_url field? That’s the one we want!
So let’s send a GET request 1 to the auth_log_url:
curl --location 'http://api.kolide.com//auth_logs/01HDW1V4TDE1B3KCAMR8V7Z4S5' \
--header 'x-kolide-api-version: <version>' \
--header 'Authorization: Bearer <token>'
From that GET request, we get the following info:
{
"id": "id1009230936994155308975657",
"timestamp": "2024-05-03T18:22:30.730Z",
"person_name": "John Appleseed",
"person_email": "johnappleseed@kolide.co",
"person_info": {
"identifier": 3,
"link": "https://api.kolide.com/people/3"
},
"device_info": {
"identifier": 16,
"link": "https://api.kolide.com/devices/16"
},
"result": "Success",
"initial_status": "all_good",
...
}
Great! We have all the info necessary to extend the user’s Slack session via Slack’s API.
Let’s start by getting the Slack user id for this user:
curl --location 'https://slack.com/api/users.lookupByEmail?email=johnappleseed@kolide.co' \
    --header 'Authorization: Bearer <slack_oauth_user_token>'
Which gives us:
{
"ok": true,
"user": {
"id": "WR3GPNZU1Z",
"name": "john appleseed",
...
  }
}
Now that we have the user’s Slack id, we can use it to refresh the session:
You can see here I’m using a duration of 36000 seconds, which is 10 hours.
curl -X POST https://slack.com/api/admin.users.session.getSettings \
-H "Authorization: Bearer <slack_oauth_user_token>" \
-H "Content-Type: application/json" \
-d '{"user_ids":[WR3GPNZU1Z, WR3GPNZU1A, WR3GPNZU1B]}'
And there you have it! This concept can also be used in conjunction with either our auth_logs.success or the auth_logs.failure webhook events. Some use cases include, but are not limited to:
- Creating a workflow that utilizes the Doordash API to deliver a delicious pint of Graeter’s Black Raspberry Chocolate Chip ice cream to a user whenever they successfully authenticate.
- Creating a workflow that utilizes a Slack bot to send a user a confetti emoji upon successful authentication.